Showing posts with label market street stamps. Show all posts

Use It Tuesday : Anything Goes

Tuesday, November 26, 2013

Today at Use It Tuesday, we have a favorite challenge for you: ANYTHING GOES! So dig into your stash of hoarded items, we know you have them, and make something. Anything. Then link up the creation by Friday, December 6th.

For this challenge, I dug out some old papers, embellishments, and STAMPS! Image stamps are not always my go-to supply while scrapbooking, so they often get overlooked. 

Shopping Scrapbook Layout
The tag and 'cheesin' phrase were both stamped onto white cardstock and cut out to make a fun embellishment. The stamp set, vintage Market Street Stamps, is a travel-themed set. However, the tag worked perfectly for this shopping layout! 

Creating scrapbook embellishments with stamps
Shopping Scrapbook Layout
Adding journaling to scrapbook layouts
There's lots of paper distressing and stitching on this layout - both machine and doodled. The title was cut from BasicGrey patterned paper using my Silhouette Cameo. The pattern was a little busy and hard to read, so I added some faux stitching with a black marker. 

Faux stitching on scrapbook layouts
Scrapbook Embellishment Cluster
Thanks for stopping by today. Now it's your turn to create something with those supplies that have been piling up! I can't wait to see what you create.

SUPPLIES :: American Crafts (Cardstock, Dear Lizzy) Teresa Collis Now & Then Floral, Pebbles Sunny Side Content, We R Memory Keepers Travel Log, BasicGrey Fact & Fiction 12x12 Paper Pack

TOOLS :: A Muse Studio Acrylic Block, Memento Tuxedo Black Ink, Tim Holtz Tiny Attacher, Brother Sewing Machine, Close To My Heart Paper Distresser

Retro Sketches :: Caffeine Fix

Friday, August 16, 2013

Hello! Yesterday I planned to have a full day to myself. I anticipated not leaving my house, sleeping in, and spending the day in my pajamas at my craft table. Sounds great, right?! After a call at 7 AM from a friend in need, I knew the day would be nothing as I planned. And sure enough, I had two other friends after that with frustrating events that needed some tending to. Rather than a day as a hermit, I ran around town. And you know what? I wouldn't change it. At the very end of the day, I was able to sit down long enough to create this card, and it sums up each of those "appointments" pretty well.

Card sketch

I used the sketch above from Retro Sketches as inspiration. I can't get enough of this sentiment. There really is nothing caffeine (and maybe a really good friend with a day off) can't fix! 

Market Street Stamps Coffee Card

The cup was stamped on white cardstock and layered on top of patterned papers and embellishments - Honestly, a random selection of items on my desk. 

Coffee card

Thanks for stopping by. May this bit of caffeine in the form of a card brighten your day!

SUPPLIES :: A Muse Studio Sugar Cardstock, Pebbles Walnut Grove 6x6 Paper Pad, Mister Huey's Dark Calico Mist, Market Street Stamps Daily Grind Set, Memento Rich Cocoa Ink, A Muse Studio Latte Pearls, Crate Paper Maggie Holmes Ephemera Pack

TOOLS :: Close To My Heart Paper Distresser, A Muse Studio Acrylic Block, Scrapbook Adhesives 3D Foam Squares, MyStik Permanent Adhesive, Fiskars Scrapbooking Rotary Paper Trimmer

Let's Catch Up

Wednesday, June 5, 2013

Good morning! I'm stopping by today to share a few cards I've created lately for Make N Takes at Creations Galore. I love the instant gratification that comes with whipping up a quick card.

I just died when I first saw this Penny Black stamp! How cute is she?! I did very little blending and shading with Copic markers on this image, making it easy to whip up a few to have on end!

I'm so sad to report Market Street Stamps has closed its doors. I loved their high quality and GORGEOUS stamps. They still have a few stamps available in their online store. But act quickly - Once they're sold out, they're gone! I made the card above with the Dreaming of the Sea stamp set. The background was made on glossy cardstock with Lettuce, Stream, and Raspberry Alcohol inks. The mermaid was then heat embossed with Princess Gold embossing powder from Ranger. MMS will be missed... I cry a little every time I think about it. Wish all the best to them on their new adventure!

Lastly, I have this card made inspired by my fisherman of a pops. The edges of each piece was distressed with the Tim Holtz Distressing Tool. The Hearts & Arrows Wood Veneers and spray ink is from Studio Calico. 

Thanks for stopping by to see what I've been up to lately!

A Three Cup Day

Wednesday, May 22, 2013

Are you a coffee drinker? I sure am! Not many mornings pass without sipping on a cup of this delightful liquid. But let's be honest... Some days call for more than just one!

Punches made this card an easy one to whip up! I stamped the cup of joe three times on the cream cardstock and adhered them to some bright blue cardstock. I used foam risers to the middle set of circles to add some dimension. 

Thanks for stopping by my humble blog today. May this card (and maybe even three cups) wake you up to enjoy this gorgeous day! 

 SUPPLIES
Cardstock: Paper Cut (Cocoa, Cream), We R Memory Keepers (Blue Feelin' Groovy)
Patterned Paper: We R Memory Keepers (Feelin' Groovy Collection)
Stamps: Market Street Stamps
Ink: Memento (Rich Cocoa)

Drill #7 :: Tic Tac Toe Challenge

Saturday, May 4, 2013

Good morning and HAPPY NATIONAL SCRAPBOOKING DAY! Sadly, I don't have any layouts to share with you today. But I do have paper projects and a great challenge for you to enter! It's time for Drill #7 at the SWAT Blog! For the challenge, you'll need to pick a row on the tic tac toe board below. Pick three across, down, or diagonal. If you have trouble seeing the grid, you can click on it to enlarge the photo.


As always, there's a great prize package up for grabs! Link up your own creation... We'd love to stop by and give you some blog love. And one lucky winner will go home with this beautiful kit!

How about some inspiration to get you started? I chose the third row down: Stamping, No patterned paper, and Chipboard. I also chose to create a card rather than a page for this challenge. Here's the creation:

I inked just a small portion of the Vintage Music background by Market Street Stamps and stamped it onto my white card base. Not using patterned paper was a HUGE challenge for me. So I created my own patterned paper! I stamped the swirl background with VersaMark Watermark onto a heart I cut out freehand. I then sprinkled clear embossing powder over the image and used a heat tool to cure the powder, resulting in a light, glossy pattern. 

The letters were cut out of a 12x12 piece of chipboard using the AccuCut machine at my local scrapbooking store. I stitched a line through the letters onto the card base to keep them in place.

Thanks for stopping by today... I hope to see your creation linked up at SWAT.

SUPPLIES
Cardstock, Vellum, Chipboard: Paper Cut
Stamps: Market Street Stamps (Vintage Music), Tim Holtz
Inks: Memento (Tuxedo Black), VersaMark Watermark
Embossing Powder: Ranger (Clear)
Die: AccuCut (Chunky Letters)
Extras: Tim Holtz Distressing Tool

Embellishment Happy

Wednesday, March 6, 2013

Hello blogland! I'm still working on scrapbooking all of my travels from 2012 including a few trips to NYC. On my last trip to the big apple, I went to the very top of the Rockafeller Center. It was a rainy night, but the view was still spectacular. 


It wasn't until I was home weeks after the trip that I realized I had taken very few photos of this special event. The pictures that I did have were a little blurry. Therefore, I gathered together all of my bright papers and embellishments to liven up the page. I love how the pink and blue coordinates so well with the pictures! 


I stamped the arrows onto white cardstock and the speech bubble on vellum using this set from Market Street Stamps.


This page is a mash-up of all my favorite companies - Amy Tangerine 3D stickers, American Crafts glitter Thickers, Creative Imaginations felt ribbon. I may have gone a little crazy, but it's become one of my favorite pages. So young and fun - just like the trip to NYC was!


Thanks for stopping by the blog today. Hope you're having a great week!

Sketch It :: Milk It

Monday, February 25, 2013

It's time for another sketch from the great challenge blog, Unscripted Sketches. I'll be honest, this week's sketch had me stumped. Take a look at it here: 


I decided to flip the sketch upside down. After playing around with several stamps and papers, my card evolved into this:

It's not exactly like the original sketch. But that's the wonder of a sketch... I say it almost every week. With Unscripted Sketches, we want to see what you come up with using the sketch as a starting point of inspiration. Link up your project here. 

CARD SUPPLIES
Cardstock: American Crafts, Paper Cut
Patterned Paper: American Crafts, We R Memory Keepers
Stamps: Market Street Stamps
Inks: Memento (Tuxedo Black), Copic Multiliner
Punches: Martha Stewart Crafts

Butterflies :: Card Making with Market Street Stamps

Thursday, February 21, 2013

Hello! Just popping in to post a card I made recently in hopes of ushering in spring. Here in Wisconsin, we're expecting another 6 to 8 inches tonight and tomorrow. But I am so ready for the warm sun, colorful tulips, and beautiful butterflies! 


I gathered together this stamp set from Market Street Stamps and paired it with the new collection from We R Memory Keepers, Simply Spring. Before rounding the corners of the white cardstock, I stamped the butterfly with various chalk inks. The edge punch from Martha Stewart Crafts is one of my favorites. I love that it can be used both horizontally and, in this case, vertically. 


Sending lots of warmth and craftiness your way! 

SUPPLIES
Cardstock: Paper Cut, We R Memory Keepers
Patterned Paper: We R Memory Keepers
Stamps: Market Street Stamp (Believing Butterfly)
Inks: Memento (Grey Flannel), VersaMagic (Thatched Straw, Aspen Mist, Aloe Vera)
Punch: Martha Stewart Crafts, EK Success (Large Rounder)

Cuppa Love

Monday, February 18, 2013

Happy Monday! I hope everyone had a wonderful weekend. A new week brings a fresh start. Every monday I post three new Make N Takes at my day job, including the card below.

Just some love and caffeine to send your way today. Thanks for stopping by and have a blessed day!  

CARD SUPPLIES
Cardstock: American Crafts, Paper Cut
Patterned Paper: We R Memory Keepers (Winter Frost Collection)
Stamps: Market Street Stamps (Daily Grind)
Ink: Memento (Tuxedo Black)
Punch: EK Success (Scallop)

Bon Voyage

Friday, January 25, 2013

Good morning! I'm here today with 
a great card sketch from Practical Scrappers


Here's my take on the sketch:

I started with these fun stamps from Market Street Stamps, digging through my stash for bright colored travel papers. Luckily, I still had some pieces from the Travel Light collection by We R Memory Keepers. I inked all the edges and added some faux stitching to liven up the card. Before attaching the airplane to the card front, I adhered a small piece of Baker's Twine and tied it to my sentiment. 

Head over to the Practical Scrappers Blog to see how my fellow design team members interpreted the sketch. They've created some great inspiration for you! 

CARD SUPPLIES
Cardstock: American Crafts, Paper Cut
Patterned Paper: We R Memory Keepers (Travel Light Collection)
Stamps: Market Street Stamps (Bon Voyage)
Inks: Memento (Tuxedo Black), ZIG Writer (Black), ColorBox (Black)

Sketch It Saturday :: Superstar

Saturday, January 12, 2013

Good morning! I'm here today with a new sketch from Unscripted Sketches, and I'm positive you're going to love this one! 


I was so excited for this sketch. There's so many possibilities. Here's the card I created:

The arrow is stamped with black StazOn ink on a patterned vellum and cut to size. To balance out the arrow and star, I added an additional stripe along the bottom of the card. Looking forward to sending this card to a superstar in my life. 

Head over to Unscripted Sketches to see all the great projects our Design Team put together and to enter your own creation! I can't wait to see what you make!

CARD SUPPLIES
Cardstock: American Crafts, Paper Cut
Vellum: Paper Cut
Patterned Paper: We R Memory Keepers (Poplin), Pink Paislee (Junk), Kaisercraft (Playful)
Stamps: Market Street Stamps (My Thoughts Exactly)
Ink: StazOn (Jet Black)
Punch: EK Success (Folk Star)

Runway Inspired :: New Year Card

Thursday, December 27, 2012

Hello! I hope you all had a wonderful Christmas holiday. Mine was full of people I loved and food that was delicious!! I'm truly blessed. But I'm back to work and here with a new card to share. Today I'm playing in the Runway Inspired Challenge, using this gorgeous dress as inspiration. I love these colors! 


For my card, I pulled together than great chartreuse color and some navy. The dress has a subtle shine to it, so I incorporated some gold foil and sequins into the card.

It's not too late to join in this challenge... Head over to their blog to link up your own project. Thanks for stopping by today!

CARD SUPPLIES
Cardstock: A Muse Studio (Navy, Wasabi, Sugar, Kraft)
Patterned Paper: DCWV (Tradewinds Stack)
Doily: KinderStampO (5 inch)
Stamp: Market Street Stamps (Essential Holiday Elegance)
Ink: Memento (Tuxedo Black)
Sequins: A Muse Studio (Gold)

Sketch It Saturday :: The Altered Circle Challenge

Saturday, December 15, 2012

Happy Saturday! It's time for another challenge at Unscripted Sketches! Along with the sketch, it's also the piggyback challenge. This challenge is do something to or with the circle in the sketch. Alter is somehow - distress it, tear it, layer it - Make the circle a unique focal point. 


For my card, I flipped the sketch and altered the design a bit. This is a great reminder from us to you -- The sketch is just a starting point to inspire you. We hope you'll take that sketch and run with it, creating cards, layouts, or 3D projects. 

The stamps are from a Market Street Stamps set called Christmas Bells. I've loved this bow stamp (by Brenda Weaver) from the moment I saw it released. I remember seeing a card Brenda created with the set, coloring the bow green. I didn't want to take another look at her creation before creating my own, as it might stunt my creativity. As I began writing this post, I went to search out the card on Brenda's blog to reference here today. Wow was I stunned. I must have subconsciously remembered more of the card than I thought, or her and I had similar ideas for this stamp. You must take a look. I almost cried looking at her card, as it looks like I copied the whole thing! Right down to the placement of the sentiment and the rounded corners! Wow, wow, wow. I almost didn't want to post this card, but the US post is already up! Have any of you come across this before?! I was so proud of how gorgeous this card turned out, and now I'm slightly embarrassed.

But let's move on to how I created the card... I stamped the bow onto white cardstock, re-inked the stamp, and stamped again onto a second piece of cardstock. To line up the bow, I turned over my circle punch, centered the bow, and punched away! 

The image was colored with Copic markers. I started by coloring the image on the circle. As I came to a piece that extended off the circle, I colored the other image, making sure the shading on both pieces was consistent and coloring only what would be seen beyond the circle. I outlined the entire image with E50. During my Intermediate Copic Certification, there was a large discussion about outlining images vs creating realistic shadows. I don't think our class ever fully agreed, but I always like outlining my images with a light color. Once the images were colored, the circle was adhered using foam risers. I didn't alter the circle in any way described in the challenge today; however, the circle truly is a unique focal point on the card!

After this part was finished, I noticed the Copic blues and my cardstock were not the exact color. Therefore, I added a second layer of kraft to separate them. Just that little change, and it works! I rounded a few corners, added some bling, and adhered a sentiment to the card base to balance out the raised circle. The stamp set comes with several different sentiments that I thought about stamping onto the card base as well. Maybe for the next card I create with this set... It's far too pretty to put away just yet! 

Thanks for stopping by... Make sure to view the rest of our lovely design team's inspiration on the Unscripted Sketches blog!


CARD SUPPLIES
Cardstock: Paper Cut
Stamps: Market Street Stamps (Christmas Bells)
Inks: Memento (Tuxedo Black), Copic Markers, atyou Spica Glitter Pen (Clear)
Bling: Queen & Co (Classy Red Pearls)

COPIC LIST
Bow: B41, B32, B45
Bells: Y00, Y11, Y21, Y26
Outline: E50
Berries: R24, R59
Leaves: G21, YG63, YG67

A card to warm your heart... and fill your stomach?!

Tuesday, December 11, 2012

The temperatures have dropped, everyone I know seems to have a cold, and all I want to do is stay inside where it's warm. With that said, this card could not be more perfect for the times!

The pot was first embossed onto a cream colored vellum. I didn't want to take away from the gorgeous patterned papers by adding a solid cardstock. I embossed the pot image a second time on cream paper and pieced it onto the original image. MyStik's permanent vellum adhesive was used to adhere the vellum to the front of card. I love how you can fearlessly use vellum with this adhesive... Can't see a single strip of it!

Thanks for stopping by today... I hope it's a SOUPER one!

CARD SUPPLIES
Cardstock: Paper Cut (Black Linen, Whip Cream)
Patterned Paper: Bo Bunny (Serenade Dot, Promenade, & Poppies)
Vellum: Paper Cut (Cream)
Stamps: Market Street Stamps (Comfort Food)
Inks: Versamark Watermark
Embossing Powder: Ranger (Super Fine Detail Black)
Adhesive: MyStick (Permanent, Vellum)

Burlap Love :: Christmas Card Edition

Monday, December 10, 2012

Hello! I picked up this Christmas set last year from MSS but just a bit too late to use them for my cards. Therefore, they were the first ones I grabbed when creating my cards this year. I wanted to create a few holiday greetings with a more masculine feel for some guy friends. Here's to hoping they'll appreciate them and not toss them in the same piles as their junk mail! 

I started by stamping the Bits of Burlap background stamp on sugar cardstock with brown ink. When pulling together the colors and stamps, I didn't realize the irony of adding actual burlap to the card front.

Thanks for stopping by tonight!

 CARD SUPPLIES
Cardstock: A Muse Studio (Sugar, Cocoa, Navy, Evergreen)
Stamps: Market Street Stamps (Bits of Burlap, Essential Holiday Elegance)
Ink: Memento (Rich Cocoa)
Brads: Graphic 45 (Stamped Metal Brads)

Neon Love

Friday, November 30, 2012

Good Morning! I recently came across neon bling and was in a hurry to use them. I pulled together additional neon goodies that I had on hand and this great stamp set from Market Street Stamps to create the card below: 

I first stamped a small area of a dots background stamp on the base of the card in light brown ink. American Crafts cardstock was ripped along one edge to create a faux washi tape look. The blue strip is glitter tape, the greatest invention American Crafts has created. The glitter on their tapes and papers seem fused to the paper, which means no left over glitter specs on your desk, computer, face, and dog! I cut a triangle out of one end of the tape and easily stuck it onto my card base.

This stamp set comes with two styles of thought bubbles, lots of arrows, and all sorts of sentiments. It's perfect for scrapbooking and card making. I chose the more traditional bubble, added a sentiment in the middle, cut out the image, and adhered it to the card base with foam risers. Lastly I added a few arrows and the bling that inspired the whole card! I went ahead and made a few different cards using the same techniques, taking advantage of the different sayings the set had to offer. Here's a look at one of the variations:

Thanks for stopping by today. Have you incorporated any neon colors in your crafting lately?

CARD SUPPLIES
Cardstock: Paper Cut (White), American Crafts
Glitter Tape: American Crafts
Stamps: Market Street Stamps (My Thoughts Exactly), We R Memory Keepers (Dots)
Inks: Adirondack (Mushroom), Memento (Tuxedo Black)
Bling: EK Success

Seasons Greetings

Friday, November 23, 2012


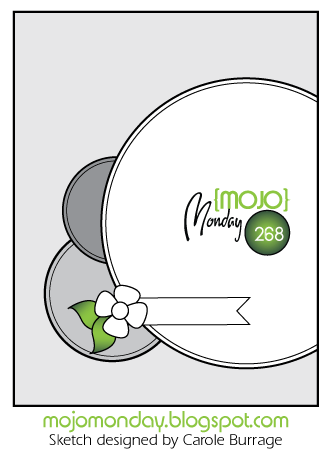
Hello! I hope everyone had a great Thanksgiving. Today Christmas music came on the radio full force, there were snowflakes falling on my way to work, and I bought my first gift of the season. It's put me in quite the mood! Therefore, I pulled together some Christmas-themed papers and stamps and created the above card using Mojo Monday's sketch as inspiration. 


I punched all of the circles from Marvy nesting punches. After layering them onto the birch patterned paper, I trimmed the shapes to size. The ornament and holly were both paper pieced onto the card. I just can't resist detail cutting! 


Thanks for stopping by today... May the joyful Christmas spirit find you as well!

CARD SUPPLIES
Cardstock: American Crafts, Paper Cut (White)
Patterned Paper: We R Memory Keepers (Yuletide Collection)
Stamps: Market Street Stamps (Ornaments)
Ink: Memento (Tuxedo Black)
Proudly designed by Mlekoshi pixel perfect web designs