Card Making Monday : Holiday Mittens

Monday, November 11, 2013

It's never too early to start your Christmas cards. So when I came across these mitten stamps at Creations Galore, I knew what needed to be done! 

Happy Holidays Christmas Card (via shezigzags.blogspot.com)


The mittens, from Stamps by Judith, were stamped on three different patterns from BasicGrey's 25th & Pine Collection. It has quickly become my favorite holiday collection this year. With such gorgeous patterned papers, paper piecing my projects trumps coloring! 

I stamped a holiday greeting by A Muse Studio onto a white banner and popped it up with foam risers. But not before stringing some yellow baker's twine around it. The ends of the twine were adhered with washi tape to the back of the mittens. 

I had so much fun making this card... Are you making your own Christmas cards this year?

SUPPLIES :: BasicGrey 25th & Pine Papers, Memento Tuxedo Black Ink, Judith Left & Right Mitten Stamps, A Muse Studio Happy Holidays Stamp, Baker's Twine, American Crafts Cardstock

TOOLS :: Tim Holtz Paper Distresser, MyStik Permanent Adhesive, Scrapbook Adhesives 3D Foam Squares

Project Life Update : Summer Love

Thursday, November 7, 2013

Good morning! I've got a few pages from my Project Life album to share with you today. The photos take place toward the end of July and were taken all with my cell phone. I'm loving the process of Pocket Scrapbooking with every new spread. 

The left side of the spread is a collection of random moments throughout the week, whereas the right side focuses on one event. 

The base cards for the left side of the spread are from the Antiquary Project Life Kit by Studio Calico. The labels and arrows are part of the Capture collection by BasicGrey. They were the perfect combination. Lots of journaling was included in the spread as the photos didn't really tell the whole story. I included pictures from around the house, work moments, a current song obsession, and this month's bus pass. These passes are a fun thing to include for a date marker. 

The right side includes one of my favorite Design G Pocket Pages as well as journaling cards from the Jade Collection by Becky Higgins. 

For the title card, I added an Amy Tan tree sticker and sticker letters. I trimmed a lined journaling card and adhered it to the right side. After a bit of journaling, I finished it with a splatter of Mister Huey's and enamel dots. 

Lastly, the backside of the spread. I was so nervous writing on this photo of my nephew, but it ended up being my favorite piece of the spread. I used BIC Acid Free Markers to include journaling on the photos and label stickers. 

Thanks for checking out my 2013 album progress. I've been working VERY out of order and enjoying the process of documenting my memories. How is your memory keeping process?

Feeding Time Layout

Wednesday, November 6, 2013

Good morning! There's nothing I love more than visiting my local Wildlife Sanctuary and feeding the hungry, and crazy adorable, geese. The layout I'm sharing today features pictures of a pleasant afternoon doing just that. 

Scrapbook Layout (via shezigzags.blogspot.com)
Most of this layout was completed with the BasicGrey Clippings collection, with pieces of We R Memory Keepers and Echo Park trickling in. I layered cut outs along the top of the photos and added stamped arrows throughout. 

creating scrapbook embellishments with stamps
I love these mixed letter stickers from the Clippings collection. They tied the various colors in the layout together. I ended the layout with a bit of faux stitching. 

alphabet stickers
Thanks for taking a look at today's layout. I hope you're having a great week and documenting every minute of it! 

SUPPLIES :: A Muse Studio I was Here Stamp Set, BasicGrey Clippings Collection, Echo Park Paper For The Record 2 Journaling Cards, We R Memory Keepers Floral Spray, Paper Cut Cardstock, American Crafts Cardstock

TOOLS :: Memento Tuxedo Black Ink, A Muse Studio Acrylic Block, BIC Mark-It Ultra Fine Point Black, Fiskars Scrapbooking Rotary Paper Trimmer, MyStik Permanent Adhesive

Card Making Monday

Monday, November 4, 2013

Happy Monday! I'm back with two new cards I created as Make N Takes for Creations Galore. If you're local, I'd love for you to stop in and create these fun cards for yourself! 

First up, is this card the most adorable papers from Echo Park. Who doesn't love a little, I mean a lot, of pie on Thanksgiving?!

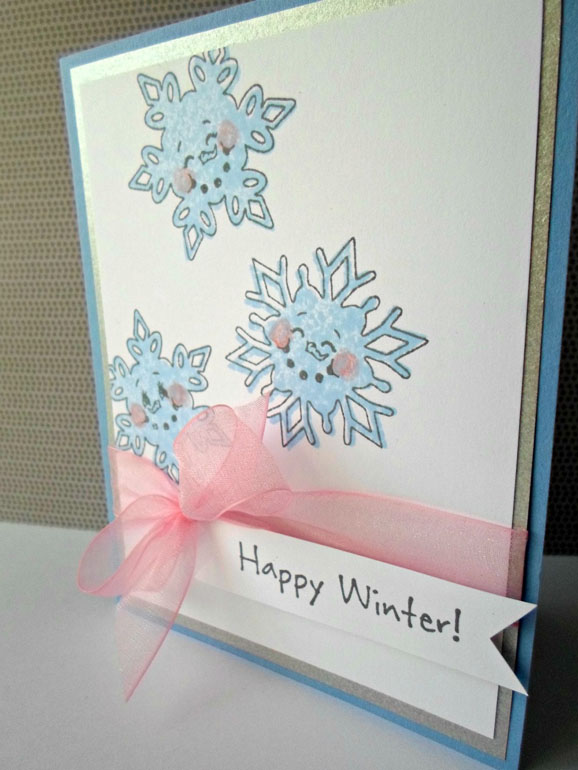
Next we're enjoying winter snowflakes using a Peachy Keen stamp set. These faces are beyond adorable. The border and solid image were stamped with different colors of ink. The cheeks were then added with pink colored pencil to match the large bow. 

Enjoy your week Paper Crafters!

Drill #19 : Ice Cream Love

Saturday, November 2, 2013

Good morning! It's time for another drill with SWAT! The holiday season is upon us, and let's face it, These times are all about the food. This challenge asks you to complete a layout that features a picture of food or a recipe. 

For my layout, I chose these fun photos taken at a birthday lunch for my dear friend, Hannah, where we indulged in ice cream. Sadly, I didn't have any ice cream papers or die cuts in my stash, so I worked with the Finely collection by Glitz Design. 

I love the 12x12 sticker sheets from Glitz. It makes it way too easy to embellish a layout. I used my finger to round the corners of a few of the stickers in order to add some dimension and movement. And I can never complete any project without a bit of paper distressing!

Make sure to head over to the SWAT blog to see the beautiful layouts my fellow design team members created. Then link up your own project for a chance to win this BoBunny Collection Pack!


SUPPLIES :: Glitz Design Finely Collection Pack, A Muse Studio Winter Sky Spray Ink, BIC Mark It Black Marker

TOOLS :: Fiskars Scrapbooking Rotary Paper Trimmer, CTMH Paper Distresser, MyStik Permanent Adhesive
Proudly designed by Mlekoshi pixel perfect web designs