Use It Tuesday :: Trends

Tuesday, August 27, 2013

Happy Tuesday, Paper Crafters! Today, Use It Tuesday is celebrating the hottest trends right now. Let's all admit it, when an item becomes popular, we need lots and lots of them! We want you to look at your stash and use up all of those hoarded items that you picked up because everyone else did!

Make sure to link up your project to the Use It Tuesday blog by noon EST on Friday, September 6th and let us know what hoarded supplies you used! As always, one lucky participant will be randomly chosen to be a featured guest designer in an upcoming challenge. 

Now, let's take a look at the project I came up with for this week's challenge:

Baby shower scrapbook layout

Hot trend: Triangles. Must have product: Thickers. Exciting technique: Paper strips on the top or bottom of your layout. 

These are the trends that I decided to incorporate into my layout. I had been hoarding this Dear Lizzy triangle paper for quite a while. I used scraps to add layers and strips to the page. The most hoarded item from this layout is the round dimensional embellishments from Pebbles. I've had them for a few years and just loved looking at them! Ridiculous, right?! The layout really came together after adding a title and a bit of journaling. 


Now it's your turn! Dig into your stash, and USE IT! 

SUPPLIES :: American Crafts (White Puffy Vinyl Thickers, Dear Lizzy Bowtie Boulevard), Pebbles Hip Hip Hooray Stitched Dimensional Stickers, Glitz Design Color Me Happy 8x8 Paper Pad

TOOLS :: Fiskars Scrapbooking Rotary Paper Trimmer, MyStik Permanent Adhesive, Close To My Heart Paper Distresser, Bic Mark-It Ultra Fine Black 

On Trend :: Trees

Monday, August 26, 2013

The On Trend Team of Practical Scrappers is headed back to nature today with a fun assignment to try: TREES! 

While looking through my photos ready to be scrapped, I came across this photo of trees. Funny, right?! I decided to take a literal approach, posting this picture along with several others of my nephew's first fishing trip.

Fishing scrapbook layout

BoBunny's Trail Mix collection won me over, and I haven't stopped creating with it. You can see a few projects made with the collection here and here. While flipping through my leftover hoarded supplies, I found this 12x12 tree paper. How convenient! I used it as the background and brought in a pice of the bark paper as well. This is one of the few layouts that I didn't plan before gluing items down. Therefore, it's a little crazy and jumbled, but it came together in under 15 minutes!

Just a note about my nephew in this picture. He LOVES behind held this way, and for the first few months he would cry if he wasn't laying in this position. I call him the expert planker. That bottom picture cracks me up every time!


I added a Dear Lizzy tag to the layout with foam risers in place of a traditional title and then placed Trail Mix die cut stickers around the layout. Before placing the sticker down, I used my fingers to round the corners. This gives a little dimension to the otherwise flat stickers.


Head over to the Practical Scrappers blog to see how the other design team members took on this trend! Thanks for stopping by. 

SUPPLIES :: BoBunny Trail Mix 12x12 Sticker Sheet & Patterned Papers, American Crafts Dear Lizzy 5th & Frolic Large Tags

TOOLS :: Tim Holtz Tiny Attacher, MyStik Permanent Adhesive, Scrapbook Adhesives 3D Foam Squares, Fiskars Scrapbooking Rotary Paper Trimmer, Close To My Heart Paper Distresser

Project Life With Practical Scrappers

Friday, August 23, 2013

Add chipboard embellishments to Project Life cards

Hello fellow paper crafters! I'm so glad you're joining me today! You can find the spread below featured on the Practical Scrappers blog, along with lots of Project Life inspiration.


With this spread, I tried to stick to red, yellow, orange, and kraft colors. Having a single color combo for the two page spread helps unify the individual events in each pocket. 

All the photos from this spread were taken with my cell phone. I also included one screenshot of Facebook status. I used the Midnight Core Kit, the Jade Core Kit, and the Studio Calico Project Life Monthly Kit. All of the journaling was written by hand.


One of my favorite parts of this spread is the cork letters from the Roundabout kit. I used them around the layout as titles and added smaller embellishments and washi tape.

Project Life title card

After studying this page, I realized how much food was highlighted this week! It's true, I really do love to eat! 


SUPPLIES :: Studio Calico (Roundabout Kit, Moments Cards), Becky Higgins Midnight & Jade Core Kits, American Crafts Amy Tangerine Discover Puffy Stickers, Chic Tags (Birthday Cake Banners, Autumn Days Labels, Flying Kites Journaling Circles), BasicGrey (Hipster Transparencies, Fact & Fiction Chipboard Shapes & Metal Flair), Pink Paislee Portfolio Clear Stamps, My Mind's Eye Relax Border Sticker 

TOOLS :: Fiskars Scrapbooking Rotary Paper Trimmer, Martha Stewart 1/2" Corner Rounder, Honey Bee Scissors, StazOn Jet Black ink, Dear Lizzy Neapolitan Date Stamp, Becky Higgins Design A & Design D Pocket Protectors, MyStik Permanent Adhesive 

Be You :: Sequins & Splatter

Tuesday, August 20, 2013

Hello! I'm back today with another card using this gorgeous butterfly stamp from Unity Stamp Company!

Unity Stamp Co Be You Card

Before adding the butterfly, I misted the background and added a few strips of patterned paper scraps. The card base is American Crafts cream cardstock. The sentiment was stamped on the same cardstock and adhered to the card with foam risers. The butterfly was stamped on patterned paper and cut out. To create additional dimension, adhesive was added only to the center fold of the butterfly.

Stamps + Patterned Paper

I instantly fell in love with the variety pack of sequins included in this month's Project Life kit from Studio Calico. They were added to the card for additional color and movement!

Thanks for looking!


SUPPLIES ::  Memento Tuxedo Black ink, American Crafts (cardstock, Dear Lizzy Noteworthy paper), My Mind's Eye Perfect paper, Crate Paper Found paper, Unity Stamp Co Be You stamp set, Studio Calico (Mister Huey's Dewey & First Kiss spray inks, Sequins from the Marks & Co Project Life Kit)

TOOLS :: Fiskars Scrapbooking Rotary Paper Trimmer, MyStik Permanent Adhesive, Scrapbook Adhesives 3D Foam Squares, A Muse Studio Acrylic Block, Close To My Heart Paper Distresser

On Trend :: Back To School

Monday, August 19, 2013

It's another gorgeous Monday morning, which means it's time to bring you another trend along with the talented ladies at Practical Scrappers. Today we're exploring BACK TO SCHOOL! 

The kiddos aren't the only ones headed back into the classroom, I created a card for a teacher friend about to embark on her first year! 

Graduation Card (via shezigzags.blogspot.com)


I found some old BoBunny papers in my stash from the Learning Curve collection, along with these stamps from We R Memory Keepers Show & Tell collection. So glad I was able to put these to good use! I cut out a few of the flash cards from the patterned paper and layered them onto the card front. Next, I stamped the images onto the papers, cut them out, and added them as the next layer. The sentiment and book were adhered with foam risers to give added dimension. 

Paper piecing + fussy cutting

Head over to the Practical Scrappers blog to discover so many gorgeous and unique Back To School Projects by my fellow On Trend team members - There's layouts, creative pockets, and gifts! 

SUPPLIES :: A Muse Studio Sugar Cardstock, We R Memory Keepers Straight A's stamp set, Peachy Keen Stamps Smartie the Owl sentiment, BoBunny Learning Curve patterned papers, Memento Tuxedo Black ink, Studio Calico (Darling Dear Opaque Gems, Mister Huey's Dark Calico mist)

TOOLS :: Fiskars Scrapbooking Rotary Paper Trimmer, MyStik Permanent Adhesive, Scrapbook Adhesives 3D Foam Squares, A Muse Studio Acrylic Block, Close To My Heart Paper Distresser

Drill #14 :: Stickers

Saturday, August 17, 2013

If you're looking for the Unscripted Sketches Flashback post, please keep scrolling. Thanks for checking out the blog! 

It's time for a brand new drill from the S.W.A.T blog. Are you ready? Drill #14 asks you to use the sketch below for inspiration AND include stickers in your layout. Now, we're not talking about Thickers, so dig around in that stash and get to work! 

Scrapbook sketch

Here's a look at the layout I created for the challenge. I apologize for the super white background... It blends in a bit with the blog background. As you can see, I rotated the sketch to the left (90 degrees counterclockwise) and changed up some of the elements. This is why I love sketches so much. It doesn't look too much like the original sketch by our very own Jennifer, but it truly was inspired by it. Sketches are always a starting point for creativity!

Scrapbook layout (via shezigzags.blogspot.com)

I used a combination of sticker letters and chipboard stickers on this layout. As you can see below, I had to do a little improvising to create an additional "B" for the title. When flipping through the scrapbook, you can't even tell! Rather than a single scalloped border behind the photos, I opted for three strips of patterned paper to really anchor the three photos together. 


I liked how the sketch had two clusters of objects in opposite corners. Therefore, I layered die cuts, chipboard, and bling in opposite corners of my layout. The yellow die cuts were cut from white cardstock using the Silhouette Cameo and then colored with watercolor paints. I backed the arrow sentiment with white scrap paper and added a little doodling to highlight the sentiment. It fit so perfectly with the theme of this page!


My dad was mimicking my nephew's chubby cheeks in this classic photo below. It became the center point for the layout. I wrote a few sentences on paper scraps and added them to the top right corner as journaling. 


Head over to the S.W.A.T blog for more sketch and sticker inspiration. And don't forget to link up your own project by August 28th! To get you motivated, we're giving away a $10 gift card to 3 Scrappy Boys and a Guest Designer spot! I can't wait to see what you create. 

SUPPLIES :: American Crafts (White Cardstock, Dear Lizzy 5th & Frolic Mini Alpha Tiles & Chipboard Shapes, Ormolu Made Pennants, Studio Calico (Dew, Fancy Free, Gable), October Afternoon Sunday Dishes, A Muse Studio Winter Sky Mist

TOOLS :: Silhouette Cameo, Circle Hearts Cut File, Chic Tags Arrows Cut File, Fiskars Scrapbooking Rotary Cutter, MyStik Permanent Adhesive, Scrapbook Adhesives 3D Foam Squares, 0.5 Black Copic Multiliner

Unscripted Sketches :: Flashback Sketch #69

Saturday, August 17, 2013

Thanks for stopping by this morning! We've got another Flashback Sketch from Unscripted Sketches! This summer, the design team has been going back in time, picking randomly selected sketches to use in a new and creative way! This Saturday, sketch #69 is the inspiration! 

Card sketch

I flipped the sketch upside down and mixed up a few of the elements. 

Peachy Keen Stamps Bunny Card

For this card, I was determined to use nothing but a 6x6 paper pad from Crate paper. Therefore, I made the base smaller than my average cards, creating a folded card of 3x5 inches. It's the perfect size to include in a baby shower gift! The bunny was stamped on the same cardstock as the card base and then again on patterned paper to piece together the pink elements. The white banner for the sentiment was the back side of a scrap of patterned paper from the pack. 

Stop by Unscripted Sketches to take a look at my fellow design team members' projects and a chance to play along! 

SUPPLIES :: Peachy Keen Stamps Somebunny Special Stamp, Memento Tuxedo Black Ink, Mister Huey's Dewey Mist, Crate Paper Random 6x6 Paper Pad

TOOLS :: A Muse Studio Acrylic Block, MyStik Permanent Adhesive, Scrapbook Adhesives 3D Foam Squares, Fiskars Scrapbooking Rotary Cutter, Close To My Heart Paper Distresser

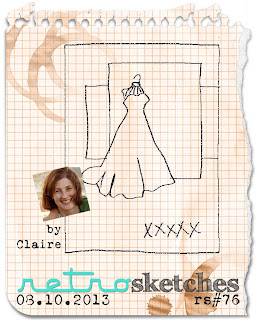
Retro Sketches :: Caffeine Fix

Friday, August 16, 2013

Hello! Yesterday I planned to have a full day to myself. I anticipated not leaving my house, sleeping in, and spending the day in my pajamas at my craft table. Sounds great, right?! After a call at 7 AM from a friend in need, I knew the day would be nothing as I planned. And sure enough, I had two other friends after that with frustrating events that needed some tending to. Rather than a day as a hermit, I ran around town. And you know what? I wouldn't change it. At the very end of the day, I was able to sit down long enough to create this card, and it sums up each of those "appointments" pretty well.

Card sketch

I used the sketch above from Retro Sketches as inspiration. I can't get enough of this sentiment. There really is nothing caffeine (and maybe a really good friend with a day off) can't fix! 

Market Street Stamps Coffee Card

The cup was stamped on white cardstock and layered on top of patterned papers and embellishments - Honestly, a random selection of items on my desk. 

Coffee card

Thanks for stopping by. May this bit of caffeine in the form of a card brighten your day!

SUPPLIES :: A Muse Studio Sugar Cardstock, Pebbles Walnut Grove 6x6 Paper Pad, Mister Huey's Dark Calico Mist, Market Street Stamps Daily Grind Set, Memento Rich Cocoa Ink, A Muse Studio Latte Pearls, Crate Paper Maggie Holmes Ephemera Pack

TOOLS :: Close To My Heart Paper Distresser, A Muse Studio Acrylic Block, Scrapbook Adhesives 3D Foam Squares, MyStik Permanent Adhesive, Fiskars Scrapbooking Rotary Paper Trimmer

Use It Tuesday :: Uninked Stamps

Tuesday, August 13, 2013

Vellum die cut flowers

Hello paper crafters! Use It Tuesday is back with one of our favorite challenges - UNINKED STAMP! I know that you have them... So get them out and create! 

After you've patted yourself on the back and marveled at your gorgeous creation, head over to the Use It Tuesday blog to link up by Friday, August 23rd. Make sure you mention you're playing along with us and mention your hoarded supplies. As always, one lucky participant will be randomly chosen to be a featured guest designer in an upcoming challenge!

Distress Ink background

I just love this stamp from Penny Black, part of a clear stamp set called . I wanted it to appear as a bold statement; therefore I stamped it black ink on white cardstock. For the background, I used the foam applicator tool to add three colors of Distress Inks. Because the inks are water based, they react beautifully to a few drops of water.

I finished up the card with a Lifestyle Crafts die that has gone untouched for over a year. The leaf was cut from patterned paper, the flower base from cardstock, and the layer from vellum. An eyelet was put through the middle to hold the layers together. It was so easy to make a dimensional embellishment! I'll need to use this more often!

Vellum die cut flowers

Now it's your turn! I can't wait to see what stamps you pull from your stash! Don't forget to see the lovely creations my fellow design team members created on the Use It Tuesday blog. 

SUPPLIES :: Paper Cut (Vellum, White Cardstock), American Crafts Cardstock, We R Memory Keepers patterned paper, Gary M Burlin Black Eyelets, Penny Black Friendship Clear Set, StazOn Jet Black ink, Distress Inks (Mustard Seed, Shabby Shutters, Peeled Paint)

TOOLS :: A Muse Studio Acrylic Block, Tonic 12" Guillotine, MyStik Permanent Adhesive, Scrapbook Adhesives 3D Foam Squares, Lifestyle Crafts Plumeria Die

On Trend :: Sunbursts

Monday, August 12, 2013


Happy Monday! It's time for another feature with the On Trend team at Practical Scrappers. Today we're looking at the sunburst trend. With summer in full swing, we're seeing this all over! I'm so excited to bring you my take in the form of layout. 


This gorgeous background paper full of clouds was the perfect starting point to document my summer photos. I found a coordinating paper and cut triangles freehand and arranged them onto the page. Embrace imperfection! No need to measure or draw them out first. Just cut. Independently, a single triangle may look weird, but it creates a fun sun as a whole. 

Faux stitching was added with a black pen to the sun rays and the word 'fly' (cut with the Silhouette Cameo). I recently received a kit from Citrus Twist with the stamp I used below the title. This layout came together so quickly with the help of the kit... I highly recommend checking out their site! They have 3 and 6 month subscriptions along with a single trial kit if desired!


Head over to the Practical Scrappers blog to see the beautiful projects using this hot trend! 

SUPPLIES :: Citrus Twist Play Land Main Kit (American Crafts Dear Lizzy Noteworthy, Crate Paper Decor, Maggie Holmes Remember This, Studio Calico Seafoam, My Mind's Eye Perfect) American Crafts Puffy Vinyl Thickers

TOOLS :: Fiskars Scrapbooking Rotary Paper Trimmer, MyStick Permanent Adhesive, Silhouette Cameo, American Crafts Black Basic Pen, StazOn Jet Black ink, A Muse Studio Acrylic Block

Sketch It Saturday :: Flashback Summer

Saturday, August 10, 2013

Good morning! This summer at Unscripted Sketches is a fun one! We're taking a look at previous sketches and bringing new life to them. There's lots of inspiration, fun, and prizes! 


I'm joining in for Sketch #56 a little late, but I couldn't resist giving this one a try!

For this card, I first laid down several layers of baby boy themed papers to coordinate with this precious bear stamp from Peachy Keen Stamps. The image was colored with Copic markers and adhered to the card front with foam risers for added dimension. 


Head over to Unscripted Sketches for this week's Flashback Sketch # 92 and join in all the fun! I can't wait to see what you create. 

SUPPLIES :: Paper Cut Cardstock, American Crafts Cardstock, Copic X-Press It Blending Card, Reminisce Patterned Paper, Peachy Keen Stamps Sleeping Teddy, Market Street Stamps Sentiment, Copic Markers, Memento Tuxedo Black Ink

COPIC LIST :: Yellows (Y17, Y02, Y21), Blues (B41, B32, B45), Browns (E11, E13, E15), Greens (YG01, YG03, YG06), C-1

TOOLS :: Fiskars Scrapbooking Rotary Paper Trimmer, MyStik Permanent Adhesive, Scrapbook Adhesives 3D Foam Squares

Project Life with Practical Scrappers

Friday, August 9, 2013

It's time for another Project Life Feature with the girls at Practical Scrappers. A few of my fellow Design Team members and I have shared recent spreads on the Practical Scrappers blog, and we'd love for you to check them out! We're hoping you find lots of inspiration for your upcoming or first Project Life page!

This is a 2 page spread that documents part of May. I chose paper and embellishments that would create a orange, teal, and kraft color scheme. Aaaand... If you look closely, you'll see I have one of the cards upside down. I quickly fixed it after writing up this post. 

I used Becky Higgins Midnight Core Kit and Jade Core Kit, along with Studio Calico's Valley High Project Life Kit (With the exception of that upside down May card which was a part of the Planetarium kit). Design D and Design A Pocket Pages were used - I challenge you to use a variety of different page designs to come up with an album as unique as you are! All the photos were taken with my cellphone, and I included 3 screenshots. 

Because there are so many of each style of journaling card in the Project Life Core Kits, I love to cut up the cards to create embellishments or use them as photo mats. In the picture above, I cut out the 'snapshot' banner from one card and adhered it to another, layering it on top of the picture. 

I tried to keep a few of the journaling cards simple. I have a habit of embellishing EVERY card, and I'm trying to break it. Especially for Project Life - It's far easier to keep up to date when the process is simplified. For the above card, I attached a screenshot of a book I'm reading on my phone with the phrase that really hit me highlighted. I added a strip of cork washi tape and stamped this gorgeous sentiment by Blinks of Life (both the tape and stamp were included in the Studio Calico Kit).

I have a love affair with BasicGrey transparencies and the Tim Holtz tiny attacher. You can especially see that in this double spread. The style is throughout. (side note: That's a peanut butter bacon burger in the picture below. wowza. Yum. I love me some Titletown Brewery)

I added more cork washi behind the negative space in the hello die cut above. It's part of a freebie cut file by Chic Tags and can be found here. I used another cut below by Two Peas In A Bucket. It was part of their Milestones collection which is no longer available. Two Peas offers new cut files and printables every month along with great freebies. You must check it out!

I want to leave you with this awkward picture of myself and one last tip! I love the BasicGrey flags, but they're not always practical. If you slowly twist the wood stick in a circular motion, it will pop right out! Now you have a cute die cut flag without the added bulk. On the card below, I removed the stick from the lovely flag and adhered it with the Tiny Attacher. 

Thanks for stopping by! Have a wonderful weekend, and don't forget to head over to Practical Scrappers to see more Project Life ideas!

SUPPLIES :: Project Life by Becky Higgins (Midnight Core Kit, Jade Core Kit), Studio Calico (Valley High Project Life Kit), BasicGrey (Hipster Transparencies, Hey You Flags, Hello Die Cuts), Simple Stories SN@P! Typeset Letters, Ormolu Made Flappers

TOOLS :: Project Life by Becky Higgins Design D and Design A Page Protectors, Tim Holtz Tiny Attatcher, Silhouette Cameo, Chic Tags Arrow Cut File, Two Peas Milestones Cut File, American Crafts (Basic Black Gel Pen, Dear Lizzy Neapolitan Roller Date Stamp), Fiskars Scrapbooking Rotary Paper Trimmer, MyStik Permanent Adhesive, StazOn Jet Black ink

Picture Perfect

Wednesday, August 7, 2013

Good morning! If you keep up with the She Zig Zags Facebook page, you know I recently had some fun with a new stamp set from My Favorite Things and my Copic markers. Here's the final product! 

I always love adding shape with the round corner punch! After my paper cutter, it may be the most used tool in my craft room. I'd love for you to leave me a comment about your favorite craft tool! Thanks for stopping by!

SUPPLIES :: Paper Cut Cardstock (Black, White), Copic X-Press It Blending Card, We R Memory Keepers (Emerald Cardstock, Acrylic & Watercolor Patterned Papers), I Love My Tapes (Black Heart Lace Washi Tape), Memento Tuxedo Black ink, Copic Markers, KaiserCraft Antique Gold Rhinestones), My Favorite Things stamps

TOOLS :: Fiskars Scrapboking Rotary Paper Trimmer, EK Success Large Corner Rounder, MyStik Permanent Adhesive, Scrapbook Adhesives 3D Foam Squares

Project Life 2013 Update

Tuesday, August 6, 2013

Hello paper crafters! I spent some time recently photographing my 2013 album, which means it's time to share. Although I use Project Life style page protectors and cards, I don't use numbered weeks and mix in traditional layouts. You can see other Project Life style posts here.

This first spread uses a mixture of the Midnight Core Kit and Studio Calico's Valley High PL Kit. All photos were taken with my phone during a impromptu ladies craft day. Two of my friends met me at Creations Galore for the day. I taught both ladies how to use my Silhouette Cameo and sewing machine to make a few decor pieces for their homes. 

I wanted to use all of the photos, but they looked awkward together on a traditional layout. Throwing in a few patterned cards and separating the pictures into unique thoughts with different pockets was the perfect solution! 

Here you can see my friend, Amber, using my Silhouette to create one-of-a-kind art work for her new kitchen. So cute! I was so amazed at the ideas she had came up with. The card below is from the Midnight Core kit. I added a piece of cardstock and BasicGrey transparency to complete it. 

I'm in love with these self-adhesive cork stars from the July PL kit from Studio Calico. As you can see, I used them on several cards.

This spread documents extremely random events that closed up the month of May. This spread uses the Jade Core Kit, Midnight Core Kit, and Valley High PL Kit. It includes one screen shot, three photos, and a ticket stub for memorabilia. I had a mini battle in my craft room debating between throwing these photos out or including them in the album. As you can see, the photos won! 

I love this details journaling card above. It's meant for journaling, but the photo fit so perfectly within the dotted lines. I decided to adhere it at a slant and add a combination of sticker letters and handwriting. 

Thanks for stopping by today! How are you documenting 2013?

SUPPLIES Becky Higgins (Midnight Core Kit, Jade Core Kit), Studio Calico (Valley High PL Kit), October Afternoon (Travel Girl Tidbits, Airmail Washi Tape), BasicGrey (Hipster Transparencies), American Crafts (Hardcover Gold Thickers), Simple Stories (SN@P!  Letters, Typeset Stickers), K&Co (SMASH Black Dots Washi Tape)

TOOLS Becky Higgins Design A Pocket Pages, Martha Stewart Corner Rounder, American Crafts (Basic Black Gel Pen, Dear Lizzy Neapolitan Roller Date Stamp), Fiskars Scrapbooking Rotary Paper Trimmer, Tim Holtz Tiny Attacher, Brother Sewing Machine, MyStik Permanent Adhesive,  StazOn Jet Black ink. 
Proudly designed by Mlekoshi pixel perfect web designs