Drill #18 : Sketchy Saturday

Saturday, October 19, 2013

Good morning! I'm here today with a new drill from S.W.A.T and it's one exciting sketch! There's just a little obstacle - You must also use wood embellishments. 

Scrapbook sketch

If you're anything like me, you've got a stash of wood veneers. Pull those out, and get to work! I recently picked up the main scrapbooking kit and add-on from Studio Calico which contained gorgeous heart wood veneers. The rest of the kit matched the colors of my photo, and this layout was born. 

Scrapbook Layout (via shezigzags.blogspot.com)
I started with this great wood background and a few layers behind my photo. To recreate the circles in the sketch, I used the Silhouette Cameo to create several sizes from patterned paper. The fun part was arranging them on the background with die cuts, wood veneers, and ink splatters. 

paper distressing
The Tiny Attacher by Tim Holtz continues to be one of my favorite tools. It's so easy to attach vellum and die cuts or just add a decorative element. The camera 'die cut' was actually cut from a 12x12 Dear Lizzy paper. 

embellishment cluster
Adding washi tape to layouts
After adding the stitch marks from the sketch with a black gel pen, the bottom left corner was still "needing something." To recreate the vertical lines in the sketch, I added a piece of BasicGrey washi tape. 

Vellum scrapbook embellishments
Thank you so much for looking at today's challenge. I'm so excited to see how you take on the Drill. Don't forget to go to S.W.A.T and check out my fellow Design Team Members and link up your own creation. As always, there's a great prize up for grabs! This month Creative Embellishments is our sponsor. 

SUPPLIES :: Studio Calico (Antiquary Scrapbook Kit, Amsterdam Add-On, Mister Huey's Sherbet)  

TOOLS :: Tim Holtz Tiny Attacher, Silhouette Cameo, Fiskars Scrapbooking Rotary Paper Trimmer, CTMH Paper Distresser, MyStik Permanent Adhesive, Scrapbook Adhesives 3D Foam Squares

Fall Blog Hop :: Autumn Scrapbook Layout

Friday, October 18, 2013

Good Morning! I've had to use the heat blanket the last few days, which means Fall has finally hit Wisconsin. The trees are changing color, and I can smell that Thanksgiving dinner already! Therefore, I'm so excited to be a part of today's Fall Blog Hop! You should have found your way here from Leslie. Thanks for joining us... I created a layout full of Fall images.

Autumn Scrapbook Layout - We R Memory Keepers
All of the images were taken near my cabin in the Northwoods of Wisconsin toward the end of fall. Lots of leaves, frost, and beautiful colors. This embossed sticker from We R Memory Keepers newest collection was perfect for the layout. 

Fall Embossed Stickers - We R Memory Keepers
To secure the stickers and add some texture, I stitched a few lines across each one. I distressed the edges of the cardstock and added a vellum layer. The pictures were meant to be the main focal point and speak for themselves; therefore, the embellishments were kept to a minimum. 

Autumn Scrapbook Layout
We can't have a blog hop without a fun prize! The Echo Park Reflections Paper Pack is up for grabs. To win, make sure to visit each blog along the way and leave a comment! 

Next up is Jennifer at My Reilly Boys and Me. In case you get lost along the way, here's the full blog hop order: 

Jessica at Finding Sunshine
Leslie at The Memory Nest
Nicole at She Zig Zags (me!)
Crystal at Capture the Moment
Tammy at Creatively Me
Jessica at My Scrappy Corner

Thanks for joining us today! Happy Fall!

SUPPLIES :: American Crafts Cardstock, Paper Cut Vellum, We R Memory Keepers Harvest 6x6 Paper Pad & Embossed Stickers

TOOLS :: Fiskars Scrapbooking Rotary Trimmer, CTMH Paper Distresser, Brother Sewing Machine, MyStik Permanent Adhesive

PS October Sketch : Love You Forever

Friday, October 11, 2013

Good morning! I'm here today to share a great sketch from Liz Chidester. You can find the sketch with lots of inspiration from my fellow Design Team Members on the Practical Scrappers Blog

Scrapbook sketch
I made the layout below using the sketch; however, I forgot about the fall theme our Design Team was trying to incorporate. Therefore, you won't see it on the Practical Scrappers blog. But the sketch is just too fabulous, and the subject of this layout is just too cute. 

Baby Scrapbook Layout
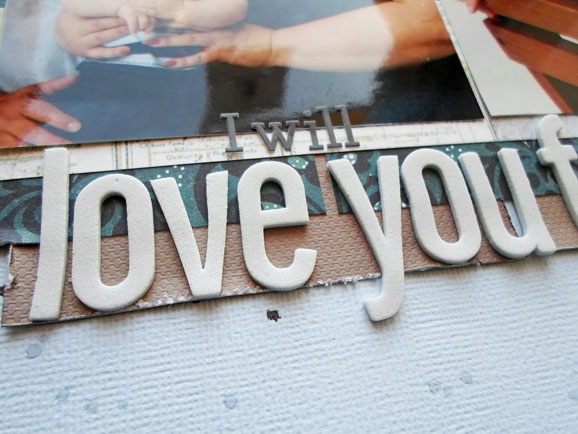
I kept the three blogs of paper behind the photos, but chose to add an additional layer. I also extended the small line on the bottom right of the photo to anchor the photos. The stars in the sketch were transfered onto the page as I found a few wood veneers in my stash. I mixed them with hearts, die cuts, and stamps. StazOn ink is a must-have when stamping on photos! Here are a few detail shots of the layout... 

Stamping on scrapbook layouts
Scrapbook titles
Thanks for stopping by. We'd love to see your take on the sketch! Head over to Practical Scrappers for more inspiration and information on how to share your very own creation. 

SUPPLIES :: Pink Paislee Daily Junque Map, BasicGrey Jordan, We R Memory Keepers Cloudy Cardstock, American Crafts (Cardstock, Daiquiri Thickers, A Muse Studio Winter Sky Splash, Studio Calico (Mister Huey's Dark Calico, Hearts & Stars Wood Veneers, Project Life Kit Stamp), Market Street Stamps, Chic Tags Doily

TOOLS :: StazOn Jet Black Ink, A Muse Studio Acrylic Block, CTMH Paper Distresser

Poolside Easter : Colorful Layout

Thursday, October 10, 2013

You read that title right! This past Easter my extended family celebrated Easter in a new way. We gathered at the pool house for food and swimming. It was a fun afternoon full of family. Inside it was warm, but outside was snowy and cold. 

Pool Scrapbook Layout

Wood veneer embellishment cluster
I used BoBunny papers from their recent Key Lime collection. The 12x12 arrow paper was chopped up and used as embellishments throughout the page. I also added wood veneers and brads from Studio Calico's atlantic collection. 

Scrapbook Embellishment Cluster
The 'Easter' portion of the title was cut from patterned paper using the Silhouette Cameo. Still loving the cut-any-font-on-your-computer feature. The bright pink letters accented the pink in the photos, which unfortunately doesn't show up the greatest when photographed a second time for the blog. 

Combining stickers + Silhouette die cut titles
Sailboat wood veneer
I'm definitely holding onto the last bit of summer with this layout. For the remainder of the day you can find me curled up in the sun next to the dog!

SUPPLIES :: BoBunny (Country Garden Dot, Key Lime Making Waves & Sun-Dew), Studio Calico (Atlantic Epoxy Brads & Wood Veneers, Darling Dear Gems), Heidi Swaap Day Glow Neon Letters

TOOLS :: Silhouette Cameo, Fiskars Scrapbooking Rotary Paper Trimmer, MyStik Permanent Adhesive

An Everyday Kind Of Day

Wednesday, October 9, 2013


Good morning! I recently discovered a few funny photos on my cellphone from a random night at a friends house. It's not fantastic photography, and my friend Hannah is making a funny face, caught with marshmallow on her face and wearing sweat pants. Why would anyone scrap these photos?! 

Well, the title of the layout answers that question. This is life. My life. Just everyday days where we lounge around the coffee table chatting about politics, our favorite movies, our fears, and how hungry we are. In that hunger, my dear friend Kimberly grabbed the ingredients for smores and started making them over the candles on the coffee table. We weren't sure whether or not this was healthy and safe, but we all followed her example. And... They were delicious. 

Friendship Scrapbook Layout
I've been convicted lately to not only add journaling and dates, but names of the people in these photos. That's part of the documentation process, right?! While teaching classes at Creations Galore, I give the example of picking up my grandmother's photos and not knowing who anyone in the photos are. I can't even recognize my own father in some! I'm trying hard to keep in mind who I'm scrapping for. For future generations and myself. And future self with a fading memory will love the triggers of their names next to the photos. 

Silhouette Scrapbook Title
Distressing scrapbook paper layers
There's a few trendy techniques that I'm still very much in love with... I sprinkled a bit of ink onto the background, distressed some of the paper edges, and added a vellum layer. 

The title was cut from patterned paper using the Silhouette Cameo. The butterfly is actually a sticker. I adhered it to white paper and cut it out so it wouldn't stick to the paper. It was then folded in half and stapled to the page. Instant dimension! 

Adding dimension to layouts
Thanks for stopping by the blog today!

SUPPLIES :: American Crafts Cardstock, CTMH Vellum, We R Memory Keepers Rustic Ledger, Echo Park  For The Record 2 Journaling Cards, Hampton Art KI Flashback Little Things Stickers, Studio Calico (Hey Day Stickers, Mister Huey's First Kiss)

TOOLS :: Silhouette Cameo, Tim Holtz Tiny Attacher, CTMH Paper Distresser
Proudly designed by Mlekoshi pixel perfect web designs