Neon Love

Friday, November 30, 2012

Good Morning! I recently came across neon bling and was in a hurry to use them. I pulled together additional neon goodies that I had on hand and this great stamp set from Market Street Stamps to create the card below: 

I first stamped a small area of a dots background stamp on the base of the card in light brown ink. American Crafts cardstock was ripped along one edge to create a faux washi tape look. The blue strip is glitter tape, the greatest invention American Crafts has created. The glitter on their tapes and papers seem fused to the paper, which means no left over glitter specs on your desk, computer, face, and dog! I cut a triangle out of one end of the tape and easily stuck it onto my card base.

This stamp set comes with two styles of thought bubbles, lots of arrows, and all sorts of sentiments. It's perfect for scrapbooking and card making. I chose the more traditional bubble, added a sentiment in the middle, cut out the image, and adhered it to the card base with foam risers. Lastly I added a few arrows and the bling that inspired the whole card! I went ahead and made a few different cards using the same techniques, taking advantage of the different sayings the set had to offer. Here's a look at one of the variations:

Thanks for stopping by today. Have you incorporated any neon colors in your crafting lately?

CARD SUPPLIES
Cardstock: Paper Cut (White), American Crafts
Glitter Tape: American Crafts
Stamps: Market Street Stamps (My Thoughts Exactly), We R Memory Keepers (Dots)
Inks: Adirondack (Mushroom), Memento (Tuxedo Black)
Bling: EK Success

Moxie Fab :: Frames

Thursday, November 29, 2012

This is my second blog post for today and a crafty one at that! Today I'm playing along with the Tuesday Trigger at Moxie Fab World. You can find more information about the challenge here, but let's look at the inspiration:

Crochet Frames

At first look, I wanted to use doilies in bright colors for a card. But then I came across this great stamp set from We R Memory Keepers. The intricate frame was perfect!

Frame Card - We R Memory Keepers


That's right, it's not background paper! I stamped the frame in grey ink and then stamped the inside image in pink. I added a black embossed flower to coordinate with the flower and leaves in the corner of the picture.

Frame Silhouette Card We R Memory Keepers

Thanks to Moxie Fab World for the inspiration... I loved this set but, until now, was unsure how to use it! Thanks for stopping by today!

CARD SUPPLIES
Cardstock: American Crafts, Paper Cut
Stamps: We R Memory Keepers (Thanks)
Inks: Memento (Grey Flannel), Distress Ink (Tattered Rose), Versamark Watermark
Embossing Powder: Ranger (Super Fine Detail Black)

My weekend in pictures...

Thursday, November 29, 2012

Good morning blogland! I spent the last two weekends at my family's cabin located in the Wisconsin Northwoods. There's no wi-fi or 4G LTE coverage, which may sound like a total nightmare. But it's something I look forward to. It helps calm the soul. I find time to read, bake, enjoy family, play cards, hike, think, and RELAX. There's just something different about the air... And of course, I still carry my cell at my side to gather a few pictures. Here's a collection of photos to recap the weekends away. Maybe a little of the pure, crisp air will transfer through the computer screen to where you are. 


Sneak Peek :: Christmas Cover Page

Tuesday, November 27, 2012


Hello bloggers! I've created a cover page for this year's Christmas album and have shared it on the Creations Galore blog for Layout Tuesday. Head over to see the full layout, as well as details about each element. 

Sketch It Saturday :: Christmas Banners

Saturday, November 24, 2012

Happy Small Business Saturday! That's right, between Black Friday and Cyber Monday, you'll find Small Business Saturday. I work at Creations Galore, an independent paper arts store in my city. I encourage all of you to support any small business in your area today! You can read more about supporting local businesses and today's holiday here.

Now let's move on to some crafty goodness. Unscripted Sketches put out one fantastic sketch this week. I absolutely love banners. The trend is still going strong. Head over to Unscripted Sketches to see the entire design team and the ways they incorporated "banners" into their paper crafting projects. Here's the sketch:


And here is my take:

JustRite has a beautiful banners stamp set that I was excited to use on this card. I stamped the smallest banners in the set on patterned papers and cardstock, cut around the design, and adhered them to the card face. I adhered the gold cord with Glossy Accents before attaching the flags. The beautiful sentiment is from JustRite as well and is stamped with black embossing powder. 

I hope you've enjoyed my take on the sketch. Don't forget to link up your own project at Unscripted Sketches... We love seeing all your creativity! 

CARD SUPPLIES
Cardstock: Paper Cut (Black Linen, Cream), American Crafts (Caramel)
Patterned Paper: American Crafts (Wreath Factory, Sleigh Shop, Lighting Department, Kringle Garden)
Stamps: JustRite (O Christmas Tree, Large Fancy Holiday Sentiments)
Inks: Memento (Tuxedo Black), Versamark Watermark
Embossing Powder: Ranger (Super Fine Detail Black)

Seasons Greetings

Friday, November 23, 2012


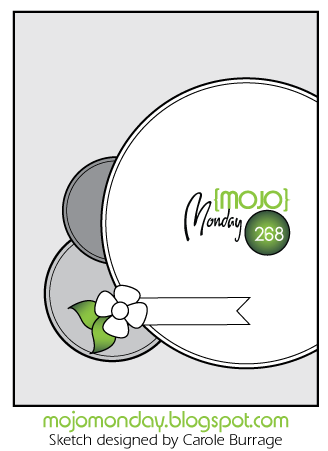
Hello! I hope everyone had a great Thanksgiving. Today Christmas music came on the radio full force, there were snowflakes falling on my way to work, and I bought my first gift of the season. It's put me in quite the mood! Therefore, I pulled together some Christmas-themed papers and stamps and created the above card using Mojo Monday's sketch as inspiration. 


I punched all of the circles from Marvy nesting punches. After layering them onto the birch patterned paper, I trimmed the shapes to size. The ornament and holly were both paper pieced onto the card. I just can't resist detail cutting! 


Thanks for stopping by today... May the joyful Christmas spirit find you as well!

CARD SUPPLIES
Cardstock: American Crafts, Paper Cut (White)
Patterned Paper: We R Memory Keepers (Yuletide Collection)
Stamps: Market Street Stamps (Ornaments)
Ink: Memento (Tuxedo Black)

Harvest Blessings!

Thursday, November 22, 2012

Happy Thanksgiving everyone! Today I will be spending the day stuffing my face full of my momma's good home cooking, and thanking God for many things. My family, that food, a roof to sleep under... And a job that allows me to have fun and enjoy my paper crafting hobbies. 

After today, Christmas music will be played and holiday shopping will be on everyone's mind, so I must sneak in one last fall-themed card! It's only fair. 

I clear embossed the Harlequin Background from A Muse Studio onto the green cardstock. I love the subtle pattern this provides. I die cut the circle and kraft shape before assembling the card. I stamped the wheat with wheat ink (ha! so perfect) and paper pieced the pumpkin with pumpkin cardstock (seriously!). 

Have the most wonderful holiday and enjoy your weekend!


CARD SUPPLIES
All A Muse Studio
Cardstock: Sugar, Rialto, Kraft, Pumpkin, Buttercup
Stamps: Harvest Blessings*
Ink: A Muse Studio (Wheat), Memento (Rich Cocoa), Versamark Watermark, Clear Embossing Powder

*The Harvest Blessings stamp set is available only as a hostess gift. To host a workshop, please contact me at nicolelaha{at}gmail{dot}com.


Free Treat Tray Template :: Decorate for any holiday!

Wednesday, November 21, 2012


Looking for a last minute Thanksgiving treat for family and friends? A Muse Studio has a FREE downloadable template of this adorable tray. The tray, which you can fill with any homemade (or storemade) treat, can be decorated for any holiday. Download the template here. I recommend using Super Stick tape or Scor-Tape, not your regular adhesive, to make sure it stays together.


Of course, A Muse Studio paper, stamps, felt, and twine make this package so pretty. You can find some of these supplies on sale as part of November's Spotlight products. Head over to my webstore to purchase any of these products. 

TRAY SUPPLIES
Cardstock: Squash, Wheat (10% off in November)
Ribbon: French Roast Satin
Twine: Toffee
Felt: Sky
Die: Leaf Trio Die Set
Stamp: Fresh Foliage (10% off in November)
Ink: French Roast

Ain't Love Grand

Tuesday, November 20, 2012

Goooood Morning! I love the Venetian patterned cardstock and color palette by A Muse Studio. The paper just asks to be used in travel layouts and cards. Therefore, I've paired it with an image and sentiment from the Let's Be Adventurers stamp set. The set if full of monuments and witty phrases.

I started this card by layering the patterned paper onto coordinating cardstock, but it seemed to bland. To add a pop of color, I cut a strip of yellow cardstock and rounded the edge with a corner rounder. A Muse Studio cardstock, both patterned and solid, has a white or cream inside. Therefore, I was able to use scraps for the banner I stamped the sentiment on! I wrapped a whole lot of twine around the card base and tied a double bow to top it all off. It seems like you can never have too many wedding and anniversary cards, so I made sure to make a few extra cards in the Venetian colors.

Thanks for stopping by the blog today! You find all these great A Muse Studio products in my webstore. Rush over today!

CARD SUPPLIES
All A Muse Studio
Cardstock: Sugar, Burano, Lido
Patterned Paper: Burano Venetian
Stamps: Let's Be Adventurers
Ink: Memento (Tuxedo Black)
Baker's Twine: Onyx

Welcome, Little One

Monday, November 19, 2012

Happy Monday! In a previous post, I shared some great news. If you haven't read the post, let me sum it up: I'm going to be an aunt! My brother and sister-in-law had their first ultrasound and found out the sex of the future-spoiled-thing. Let me just say this: The kid's already freakin adorable. I'm going crazzzzzzzy, because they're choosing to keep the gender a secret to everyone but immediate family until the baby shower. How can I buy lots of clothes, and make cute gifts, and plan a shower without TELLING ANYONE?! Since I can't contain all of my excitement, I created this fun little card:

Note the blue AND the pink?! No secret clues here. I cut two strips of A Muse Studio patterned papers and tore one edge to create the look of Washi Tape. Next, I paper pieced the grey and pink elephant. I adhered the elephant to white cardstock and cut out the image. The white edge makes the image pop in front of the cork. Yes, CORK! The Canvas, Cork, & Burlap Challenge at Moxie Fab World has really inspired me. Since remodeling my craft room, I had cork squares just laying around to be thrown out. The material, once used as an inspiration board, tore apart easily. It was just the right color and texture for this adorable card! The sentiment was stamped in black ink and added to the card with foam risers to mimic the dimension of the cork. The faux stitching was added with a black marker after all the pieces were assembled. 

I hope you've enjoyed today's card. Many baby updates to come... 

CARD SUPPLIES
All A Muse Studio
Cardstock: Sugar, Blush, Seattle
Patterned Paper: Onyx Gingham, Blueberry Polka Dot
Stamps: Little Peanuts (sentiment), Under the Big Top (elephant)
Ink: Memento (Tuxedo Black)


Sketch It Saturday... Wait, Isn't It Sunday?!

Sunday, November 18, 2012

Hello bloggers! Friday night I arrived on the doorstep of my cabin, a place of relaxation and no internet or phone service, only to remember I had not written Saturday's post! I'm back home now and ready to share with you the great sketch Unscripted Sketches put together this week! Here's the sketch:


And here's my card:

I changed the card from a square to an A-2 rectangle. Part of this Sketch It Saturday challenge was to use dry embossing in addition to the sketch. I ran the cream cardstock through an embossing folder, and ran my brown ink pad on the raised edges. 

After seeing Moxie Fab World's Stitching & Sewing Challenge, I was in the mood to add some creative stitching to the card. I used the Sew Easy to create a zig zag pattern along the side of my sentiment and added some cream floss. The pie image is paper pieced and looks soooo delicious. I think I'm officially in Thanksgiving-Turkey-Dinner-Pumpkin-Pie-Mode. I can't wait for my momma's cooking!

I hope you've enjoyed my take on the sketch. Head over to Unscripted Sketches to see the rest of our AMAZING Design Team. While you're there, link up your own project. We'd love to see what you create!

 CARD SUPPLIES
Cardstock: American Crafts, Paper Cut
Patterned Paper: We R Memory Keepers
Stamps: Market Street Stamps
Ink: Adirondack (Espresso)
Embossing Folder: Sizzix/BasicGrey
Floss: Bazzill
Extras: We R Memory Keepers (Sew Easy Zig Zag)

I Love Burlap

Thursday, November 15, 2012

Good morning! While visiting the Moxie Fab World Blog recently, I came across their Canvas, Cork, & Burlap Challenge. Burlap is one of my favorite textures, so I just had to give it a try! Here's the card I created for the challenge:


I layered several layers of textures for this card: burlap, doilies, cardstock, staples, and baker's twine. It's like a list of of my favorite things! 


I used punches to create the heart and scalloped circle and stamped the sentiment using my A Muse Studio stamps. 


What do you think? I'm loving this challenge and may need to try the cork option next!

SUPPLIES
Cardstock: A Muse Studio (Onyx, Sugar, Rialto)
Patterned Paper: A Muse Studio (Onyx Gingham)
Doily: Gary Burlin
Stamp: A Muse Studio (Essential Sentiments)
Ink: Memento (Tuxedo Black)
Baker's Twine: A Muse Studio (Onyx)

Berry Sweet Sketch

Wednesday, November 14, 2012

Hello bloggers! I'm playing along with Mojo Monday today, using Sketch 267 as inspiration. 


I was really excited about this sketch and created this:

The image and sentiment are a Market Street Stamps Mini. I stamped the strawberry image in Memento black ink and colored it with Copic markers. The patterned papers are from Christmas-themed collections; however, I think they work fantastic for these bright, juicy fruits! Here in Wisconsin, the temperature is in the 30's, so I'm creating some summer warmth with this card. 

I created the scalloped edge by cutting a piece of patterned paper 1 x 3 inches. The scalloped, stitched edge was added to the piece using the Sew Stamper tool from We R Memory Keepers. This is my new favorite tool! You can add even stitch marks in no time at all! I then cut around the stitches to create the scallops. 

Thanks for stopping by! Head to Mojo Monday to link up your own creation!

 CARD SUPPLIES
Cardstock: Paper Cut (White Felt)
Patterned Paper: We R Memory Keepers (Snowflake), Bo Bunny (Mistletoe Chevron)
Stamps: Market Street Stamps (Berry Sweet)
Inks: Memento (Tuxedo Black), Copic Markers
Ribbon: American Crafts (Jute Black)
Bling: A Muse Studio (Clear Twinkle Stickers)
Sew Stamper: We R Memory Keepers (Scallop)

COPIC COLORS LIST
Reds: R24, R27, R29
Greens: YG13, YG17

Gobble 'Til Ya Wobble

Tuesday, November 13, 2012

Good morning! Yesterday, I posted three new cards on the Creations Galore blog, including this fun Thanksgiving card. How ADORABLE is this turkey and the sentiment from Peachy Keen Stamps?!

My jute ribbon obsession continues. After tying a bow, I added a self-adhesive pearl to the knot. 

I stamped the image and sentiment in Memento dye ink and colored him with Copic markers. After blending the colors, I added a few dots of the darkest color marker to add some texture. I was really happy with how it turned out.


 I'm getting so excited for Thanksgiving... It's my favorite holiday of the year! 

CARD SUPPLIES
Cardstock: Paper Cut (White)
Patterned Paper: Bo Bunny Camp-A-Lot (Dot, Firewood)
Stamps: Peachy Keen Stamps (Tanner Turkey)
Inks: Memento (Tuxedo Black), Copic Markers
Ribbons: American Crafts (Jute Yellow)
Bling: Melissa Frances (Cream)

COPIC COLOR LIST
Skin: YR20, E53, E55
Wings: E42, E43, E44
Feathers: E31, E33, E35, E37
Green: YG63, YG67
Orange: YR16, YR18, E08
Red: R27, R59
Hat: W-3, W-5, W-7
Buckle: Y17, YR23

Christmas Tag Cased

Friday, November 9, 2012

Last November, I had the pleasure of teaching a Christmas Tags Workshop at Creations Galore. This was my favorite tag from that class: 

I came across the tag this week while planning my Christmas decor, cards, and gift wrapping. It's one of my creations that I kind of drool over... Do you ever have any of those? Creations that turned out more beautiful than you ever imagined. And this one was so simple to create! Therefore, I thought I would case my own tag, turning it into a holiday card. 

I kept the design and elements, adding a few extras. I embossed the image with white embossing powder and stamped the sentiment with black StazOn. Random thought: I've never seen a bird on a buck's horns outside of a Disney movie and this card... But I absolutely love the image!

The tag is cut using an AccuCut die from similar colored papers. I used a brighter red cardstock this time around to match the patterned paper from American Crafts. I first cut the tag from the kraft colored cardstock. After embossing the stamped image, I adhered a small strip of red cardstock. Lastly, I trimmed the cardstock to keep the rounded corners of the tag.

A touch of ribbons and a pearl to add some flair to the card. 

What do you think? I'm looking forward to making a few more and sending them out for the holiday! This success has me wondering what other cards from my past creations I can case. 

CARD SUPPLIES
Cardstock: Paper Cut (Fossil, White, Red)
Patterned Paper: American Crafts (Reindeer Runway)
Stamps: Martha Stewart Crafts (Scandinavian)
Inks: Versamark Watermark, Ranger Embossing Powder (Seafoam White), StazOn (Jet Black)
Bling: A Muse Studio (White Pearl)
Proudly designed by Mlekoshi pixel perfect web designs